An idea of how to make a circular drawstring sewing bag
I thought I’d have another go at making a drawstring sewing bag and this time take a couple of photos to explain what I mean.
The basic requirements for this little bag are:
. 2 lined circles, one bigger than the other,
. cord or ribbon for the drawstring
. 2 large beads or buttons or some extra fabric to sew on the ends of the drawstrings
The circles have to be quite a bit larger than I imagined. I suggest drawing around a dinner plate for the SMALLER circle and one inch outside the dinner plate for the larger (outside) circle.
1. You will need to cut 2 of each of the 2 circles so you will end up with 4 circles, 2 big and 2 slightly smaller.
2. Sew all around the SMALLEST circles (right sides together) with approx a 1/4 inch seam EXCEPT FOR A GAP OF ABOUT 3 inches that you will need to turn the circle inside out. Turn this small circle inside out, press and then top stitch near the outside edge carefully closing the opening by neatly tucking the seam allowances inside. Put aside.
3. Sew the 2 LARGEST circles right sides together. you will need to leave approx a 4 inch gap for turning AND ALSO 2 one-inch gaps, opposite each other to use to thread the drawstrings through.
Turn this LARGE circle inside out and press. Top stitch around edge, EXCEPT for 2 one-inch gaps using the topstitching to neatly close the 4-inch turning gap.
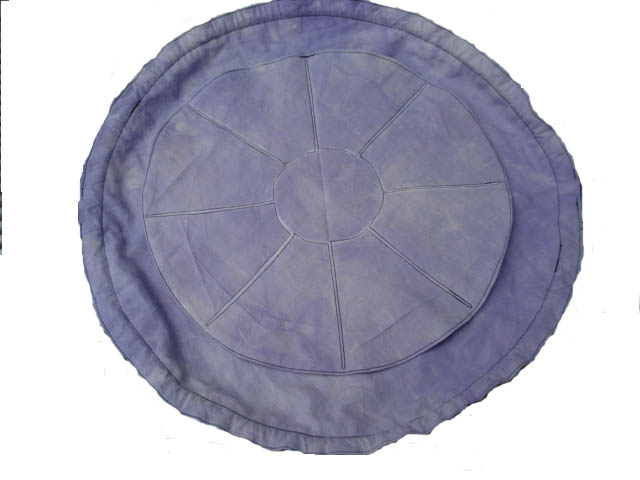
4. Fold the SMALL circle in half and iron to press. Fold in half again & press with iron, and fold in half one more time and press again. Open up carefully and you should have folds that divide the circle into 8 sections. Using tailors chalk or ordinary blackboard chalk draw over these folds so that your circle looks like a cake cut into 8. (see first photo at top of page). Find a small circle (e.g a glass) to draw around in the centre of this circle (see above). This will look like the centre of a flower with 8 petals around it.
5. Place the SMALL circle on top of the LARGE circle equally (see photo above). Place a pin in the middle. Carefully pin in between each line so that you will be able to sew along both sides of each line.
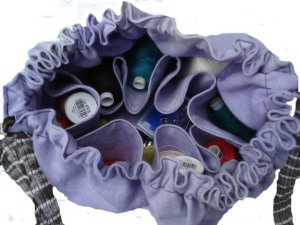
6.Starting at the outside of the small circle, sew down the right-hand side of the chalk line till you meet the centre drawn circle, sew along the curve of this centre circle till you meet the next line. Sew along the nearest side of the next chalk line (towards the outside of the circle of fabric) and then back down alongside it until you meet the centre circle again. Sew along that section of curve and up one side of the next chalk line etc etc until you finally arrive back at where you started. ALL THIS STITCHING WILL SHOW THROUGH ONTO THE OUTSIDE OF YOUR BAG. These lines of stitching make eight small interior pockets for reels of thread etc.
7. Back on the largest circle, sew a second line of stitching one-inch inside your outside line of stitching (do not leave any gaps in this stitching.
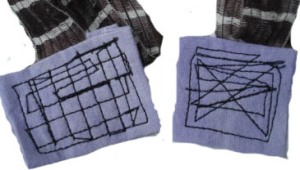
8. With a safety pin, thread a long drawstring (longer than the circumference of your circle) in through one gap, all way around the circle and back out where it entered. Starting at the OPPOSITE gap, thread another long drawstring through the other gap, all around the casing and back out where it entered. You need to knot the paired ends of drawstrings and either tie a large bead or button through and knot securely so that they don’t disappear into the gaps or, do as I did and, sew each pair of ribbon ends into a piece of doubled-over fabric and stitch quite a few times to secure the ribbon inside the fabric. On reflection it would have been neater to make triangular-shaped “ends” to sew the drawstring/ribbon into.
I’m quite pleased with this bag apart from the fact that the inner circle shouldn’t have been so much smaller than the outer circle.Next time I will make them with probably only one-inch in difference between the two circles.
Somehow I should be able to make a circular pincushion that is permanently attached to the “flower centre” inside the bag.
It also needs an attached needle-case and attached small scissors holster.


