Not Twin quilts

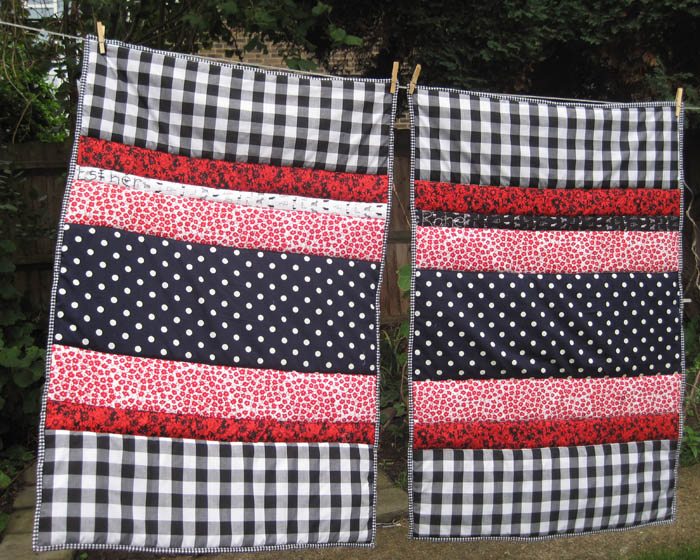
Another baby enters the world and so another quilt or “cuddly” must be made. This baby has a sister who isn’t yet two and who didn’t receive a “being born” present from me so I decided that it was only fair to make them each a quilt.

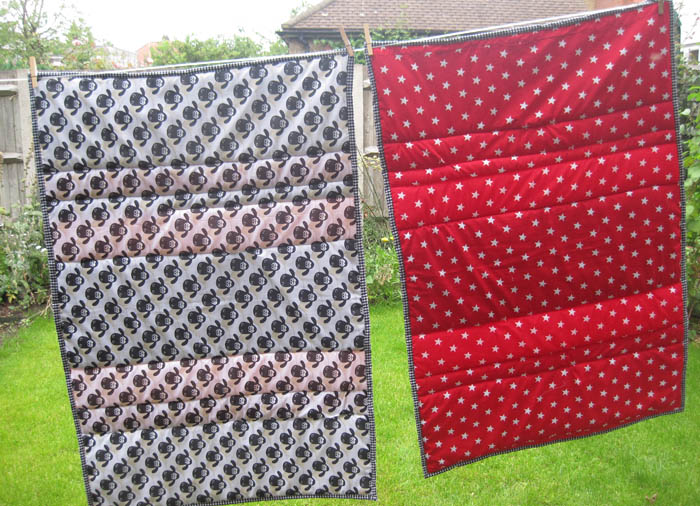
My inspiration came from the new baby’s name. She is called Rahel which is the Hebrew for ewe or female sheep. Way back when we first took TLM (the Loom Monkey) up to Durham to start his education, I purchased some sheep fabric at Durham market so it seemed appropriate to take the scissors to it for the reverse of baby Rahel’s “cuddly”.  Big sister is Esther, which in Hebrew means star and a lunchtime outing to my nearest to work fabric emporium found me the happy purchaser of a metre of red material scattered with white stars. 

The fronts of the quilts are almost identical.  Towards the upper edge of each I have inserted a narrow strip of fabric covered with tiny sketched animals. The strips are from the two different colourways of a fabric. One is white and one is black. The binding on each quilt is tiny black and white gingham, a favourite binding fabric of mine and as a final touch I embroidered each of the girls’ names on that narrow animal strip. My reasoning behing all this is that each cuddly is similar enough so that there are no arguments about which belongs to which but the girls will be able to know that it is their own quilt from both the back and the front.

Their father is not due back from paternity leave for quite a while so I had to squidge both quilts into a parcel and run off to the post office in my lunch break.

Earning my stripes

Whatever the result of my incarceration with the loom, I had a great time watching a range of DVDS. As well as my dash through the decades (see my previous blogpost), I also watched the Comic Strip “Five Go Mad in Dorset” whilst slurping a mug of tea or tea in the absence of “lashings of ginger beer”. What spiffing fun.

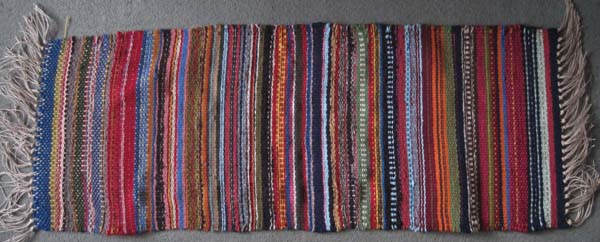
This stripey rug which is about 110cm long started with the mid blue on the left and progressed through a series of random stripes mainly dictated  by odds and ends of yarn. I didn’t want to use anything “proper” in case I wasted it. More or less my only design criteria was that I felt i should have “dark” every now and then so that the tones didn’t all blend into one another. I had fun experimenting with the odd vertical stripe now and again. Confusingly above these vertical stripes will show as horizontal. You may notice the green & white just right of the centre, followed by the dark blue & light blue and brown & white whichis hiding in between a navy and a maroon stripe.

I became rather grandiose suggesting that each of my children have a section that represents them. Son “J” supports Aston Villa so there is a light blue & claret section for him. Son “G” usually has green objects allocated to him and so the green and white vertically-striped section is his. My Little Darling, no longer so little, has a deep pink section shot through with a more vibrant shiny pink.  it doesn’t show on the photo but I know it’s there.

The fringe of the rug is just knotted but I think I will try a twisted fringe next.

Developing an idea …. non-invasive Christmas decoration

What if you were going to be away from home for Christmas? What could you take with you to ensure that your home-from-home would not seem bare in the festive season?

noninvasive-xmasdec

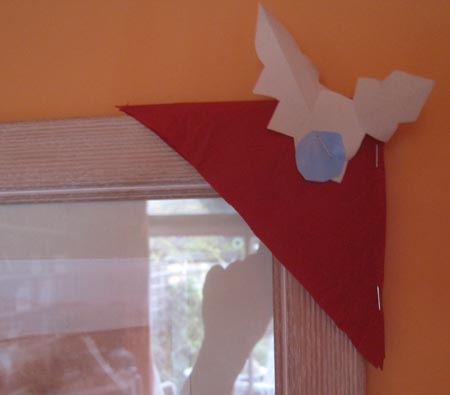
Voila – a  non-invasive Christmas decoration!

This is the prototype. Materials used here were a tatty old red paper napkin, a piece of scrap paper (for the leaves of unidentified species) and a large berry cut from a piece of sky in a magazine picture. As you can see, in the prototype, the side of the folded large triangle has been stapled, as were the leaves and berry.

I will now try a version made from red and green felt, with the side sewn closed and the leaves and berries sewn on with a couple of stitches. Or what about using  4 red fabric triangles with quilt batting/wadding sandwiched in between?

If my pictures and words don’t make sense then think about a photo held in an album by those triangular photo-corners.

Going Round in Circles

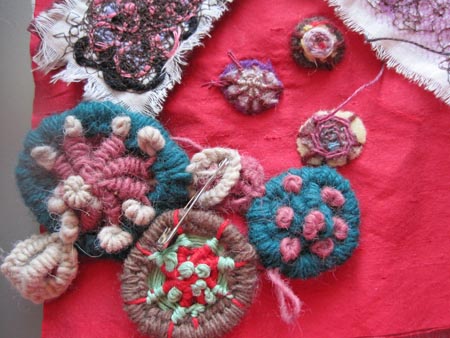
dorset-circlesI really should have been getting ready for work but instead I was off reading blogs as I usually do while I eat my breakfast each morning. It sets me up for the day. I pop in to see all my old friends and then often get sidetracked and find someone new and decide they are worthy of being added to my bookmark bar at the top of my web browser.

This morning a wandering path led me to LAVENDERHOUSE and her posting called CIRCLES OF COLOUR which reminded me of something I started to play around with after a visit to the Knitting and Stitching Show at Alexandra Palace in 2007. Yes I did type 2007 intentionally. I went to one of those 15 minute classes. The pieceof red silk is from the class as are those three spiderweb circles stitched to the red silk. Everyone else there seemed to be an expert at embroidery so I was the obligatory slow one in the corner. Luckily now that I am allegedly grownup I don’t care what anyone else thinks and I just get on with enjoying  the moment and taking away from I can. in this case that something was the inspiration of DORSET BUTTONS and so I played around (see bottom left of pic) with something that owes its technique to dorset buttons, crochet, tatting and probably other crafts as well.

The results have remained pinned to the red silk on the wall in J’s old bedroom, where I keep my sewing machine, forgotten until I read Ms LavenderHouse’s blog this morning. Those circles were made with short craps of yarn lying in or around the bin so very much in keeping with what Ms LavenderHouse was told by Madeline Millingtonnot …”not to bother with expensive yarn as cheap yarn in rainbow colours gives a really good result.”

… and sew I rest my case

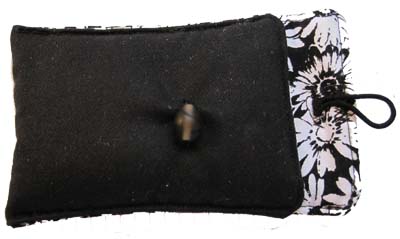
camera-case

I couldn’t bear to part with real money for a camera case so ran this up from a few scraps. I forgot how much things shrink when quilted. Although this isn’t actually quilted because there are no lines of stitching, other than seams, holding it all together, it is padded with a DOUBLE layer of wadding so what was a very respectable flap has magically shrunk to a “just about” flap.  The closure is half a hair elastic and a bead.

Cosy Times

knit-teacosy-green-flowersA friend was kind enough to send me a book containing knitted and crocheted tea cosies. Being one of those people who never has the right needles or yarn I decided just to grab what I had and have a stab at one.

So off I went, whilst watching something mindless on television, wrong needles and inappropriate yarn flailing. This one is large doubled-over footless sock. Then you have to knit or crochet a saucer-like top to stitch inside your footless sock. The final stage is to knit or crochet flowers, leaves etc to burgeon forth from your woolly creation. I had a brainwave – somewhere – lurking in the depths of bags and boxes I had some bits and pieces. With my machete in hand, I braved the depths of what we euphemistically call “the dining room” and managed to uncover a bagful of  leafy, flowery stuff that I threw at my pro-type cosy.

You can see the result above – just don’t move the cosy perched on the upturned plastic jug, because if you do all that verdant growth will fall like leaves in autumn.

The N U M P bag

I’ve spent most of today making a N U M P bag (Network cable, Usb cable, Mouse, Power cable)
for G.

He saw my drawstring sewing things bag and decided that he would like a bag, made to a similar design,
to contain cables and other bits and pieces for his laptop. This cable-organising bag could then be
slung in his rucksack without everything ending up as a rat’s nest.

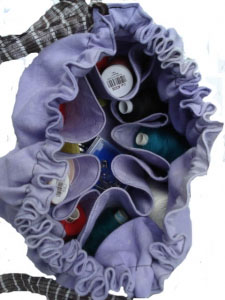
When opened completely flat, the sewing bag is a very large circle.

sewbag-23nump-bag-12

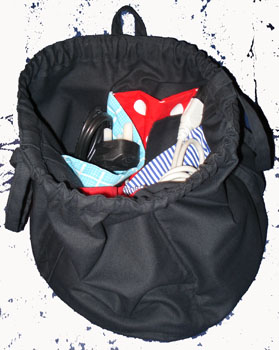
The  N U M P   bag, however, is made as a cylinder. It looks a little like a small fabric bucket.
The exterior fabric is black cotton duck. Black chosen to be masculine and the cotton duck because it is a sturdy fabric.

Inside the  N U M P  bag there are 4 pockets/dividers, each made from a different fabric. A really
organised person will always put a particular cable back in a particular pocket, therefore making it
easy to know where each cable is. Each of the pockets has a smaller pocket on the outside, two of
them wide and two skinnier ones which can be used for pens, pencils etc.

The bag has a circular bottom and a drawstring closure. There is a sturdy grab handle on each side,
and a loop so that the bag can be hung up on a hook.

Purple Play & Sock Silliness

I live not far from Hounslow, Middlesex. It is a mini-mini-mini Southall. By that I mean that it has a high Asian population and consequently a good few shops full  of Asian goodies. One of these shops sells fabric, much of it with a great bling factor and even better than that there is usually some very cheap fabric to be had. The downside is that I never really NEED any such fabric but of course I can’t resist a rummage in the remnant bin or the purchase of “just one metre” of this and that. So it was that a few years ago I acquired this purple fabric.
purple-play1

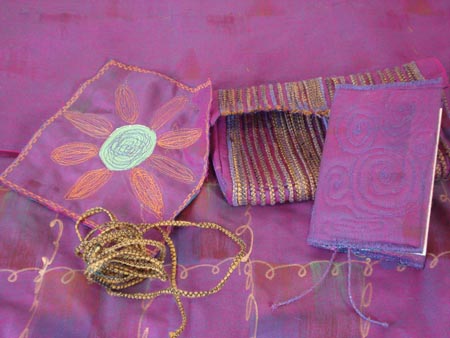
If you look at the bottom of the photo you will see the front of the material. It really is a bit too much for me to think of anything to use it for and so it has languished in various bags, piles and heaps since it came home with me.

For a while I have been considering that the back of the fabric would be more useable even though those gold squiggles show through in places. My scissors first cut into two pieces that I sandwiched together with some wadding to make a cover for a notebook. I also sewed in two bookmarks made from wrapped yarn. I used a length of red yarn and machine wrapped it with red bobbin thread and blue top thread.

My second piece of purple playfulness was the unfinished clutch bag in the middle. I bought some bondaweb with the idea that being double-sided I could fuse it between two layers  of the fabric and it would also give it some substance. I don’t know what I was thinking of because of course the bondaweb is so gossamer-like that once the two protective layers are removed  there was no substance left. I probably should have abandoned the project there and then but I’m not like that. I enjoy messing around. So I picked up my second attempt at wrapped thread that had turned out to be what I grandly call “antique gold”. I then began to sew strips of this wrapped thread all over the cut out & sandwiched fabric pieces (one body +flap piece and two gussets). Soon they began to act rather like a corset and when I sewed the pieces together into the bag shape it was more or less self-supporting. Now I think that I will I have to line it somehow and I’ll probably use a double or triple length of the remaining wrapped thread for a strap (even though clutch bags don’t need a strap).

Moving on to the SOCK SILLINESS …
sock-quilt1

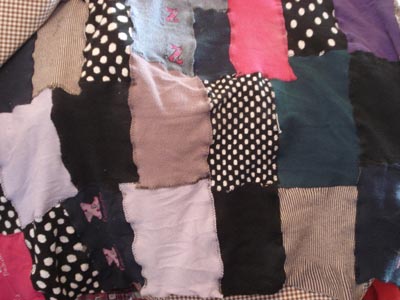
I have my father’s big toes. They seem to have a life of their own and though I don’t ever feel them at it, I know that they wriggle and jiggle all day inside my shoes. How else would I have one giant hole in each toe of nearly all of my socks. Yes, I do know how to darn and I do darn although most of my socks are a cotton mix and don’t accept a lot of darning or in my case, major reconstruction, as well as wool socks do.  A week or two ago I was being all New Yearish and I emptied and sorted my sock drawer. I had no idea how many pairs of socks I had  because quite honestly I ran out of fingers and toes (big or small) to count them on. I took a deep breath and decided to throw out all those socks that had darns on the darns or were in urgent need of such. The pile was mountainous and I just couldn’t bear to throw them out. I had several pairs of spotty, dotty socks and many with stripes. I have a weakness for both. So .. I cut off the damaged toes, the heels (which  are the most three-dimensional part of the sock) and the cuffs. This resulted in two “tubes” per sock and I cut down each down the length resulting in a flat pirce of sock fabric. Then in a very haphazard way I zig-zagged the pieces together. Now what on earth have I ended up with …. a squilt? And what on earth do I do with this “squilt”?

Finally … on the left …. two more pieces of the fabric, right bright sides together. The flower’s centre made from a green foil wrapper from a chocolate (“borrowed” from the Loom Monkey’s magpie stash of “useful things”) and the orange petals machine embroidered. Finally I stitched a decorative machine-embroidered border around the edge of the piece sandwiching the two pieces of fabric together.